
The perfect little gingerbread biscuit – you can almost smell them! This is a super quick pattern with no sewing required as the biscuits are crocheted seamlessly. The possibilities are endless: string them along in a decorative garland, attach them to gifts as adorable gift tags (perhaps embroider an initial or a name?), hang them up on the Christmas tree or add them to your kids’ play kitchen (which is what I’m going to do with mine!).
The finished gingerbread man biscuit, using chunky yarn and a 5mm hook measures approximately 10cm (4in) tall and 9cm (3.5in) wide.
Materials:
5mm crochet hook (or a size smaller than recommended for the yarn used)
chunky yarn (I used Stylecraft Special Chunky in Gold and Special Aran in Gingerbread, held double)
small amount of yarn in white (thinner than main yarn used – I used DK)
stitch marker
knitting/darning needle
small pom poms (if using)
Abbreviations:
MR – magic ring
WS – wrong side of work
sl st – slip stich
ch – chain
sc – single crochet
hdc – half double crochet
inc – work two single crochet stitches in one stitch
dec – single crochet two stitches together
(inc, 3 sc) – increase, then work 3 sc stitches in each of the next 3 stitches
(….) x 3 – repeat the instruction in the bracket 3 times
This pattern is written in US crochet terms.
Gingerbread Biscuit (make 2)
Head
With Brown yarn, make a Magic Ring
Row 1: 6 sc into the MR, sl st to join
Row 2: ch1, inc in each st, sl st to join, turn work so that you are facing WS (12 sts)

Body
Row 3: ch1, inc in next st (which is the joining sl st of the previous round, turn work (2 sts)

Row 4: ch1, inc, sc in next st, turn (3 sts)
Row 5: ch1, inc, sc in next 2 sts, turn (4 sts)
Row 6: ch1, inc, sc in next 3 sts (5 sts). Do not turn work.

Row 7: ch1, turn work sideways. Working on the side of the body, work 3 sc (one sc per each row).
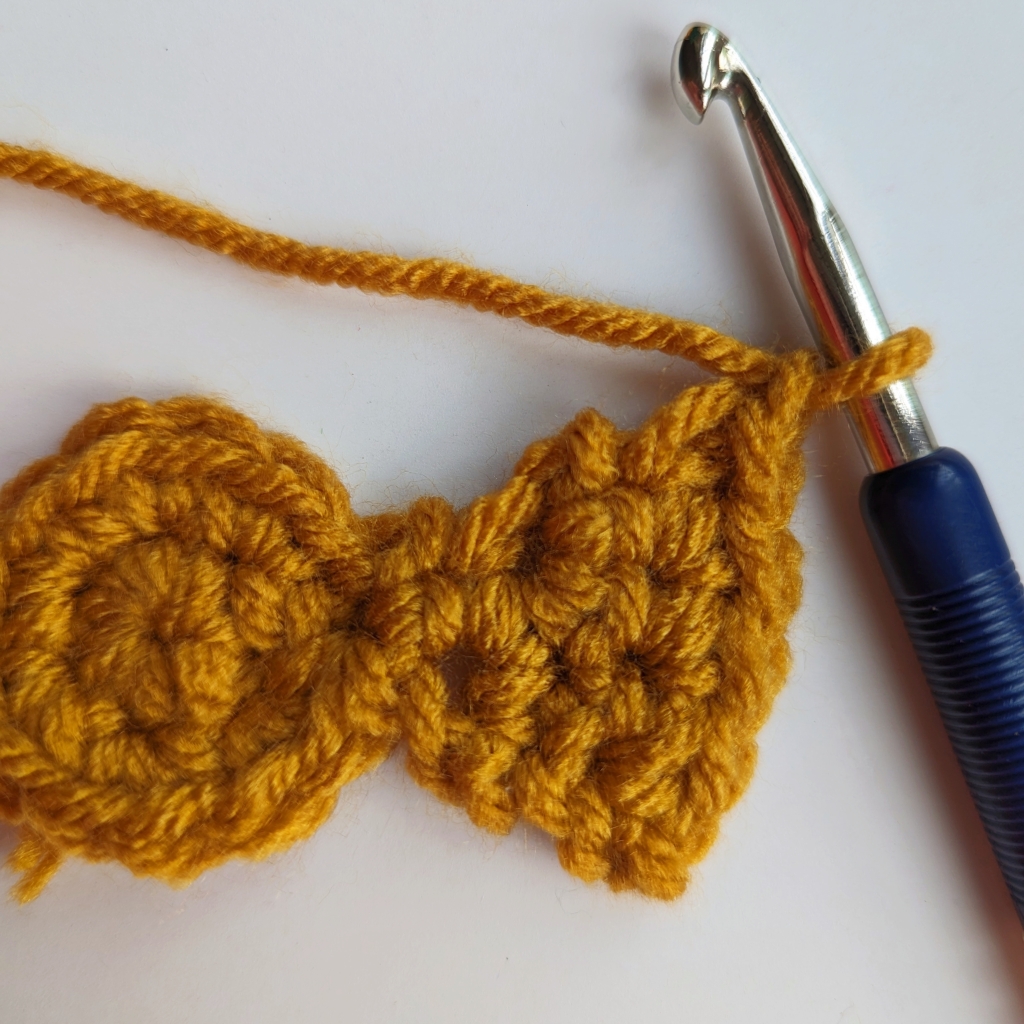
Row 8: sl st just below Row 4. Ch5 and starting in 2nd st, hdc in each of the next 4 ch. Sl st to just above Row 4.

Row 9: sk 1 st, working around the head: (inc, 1 sc) x 5, sk 1.

Row 10: sl st to just above Row 4. Ch5 and starting in 2nd st, hdc in each of the next 4 ch. Sl st to just below Row 4.

Row 11: Working on the side of the body, work 3 sc (one sc per each row).
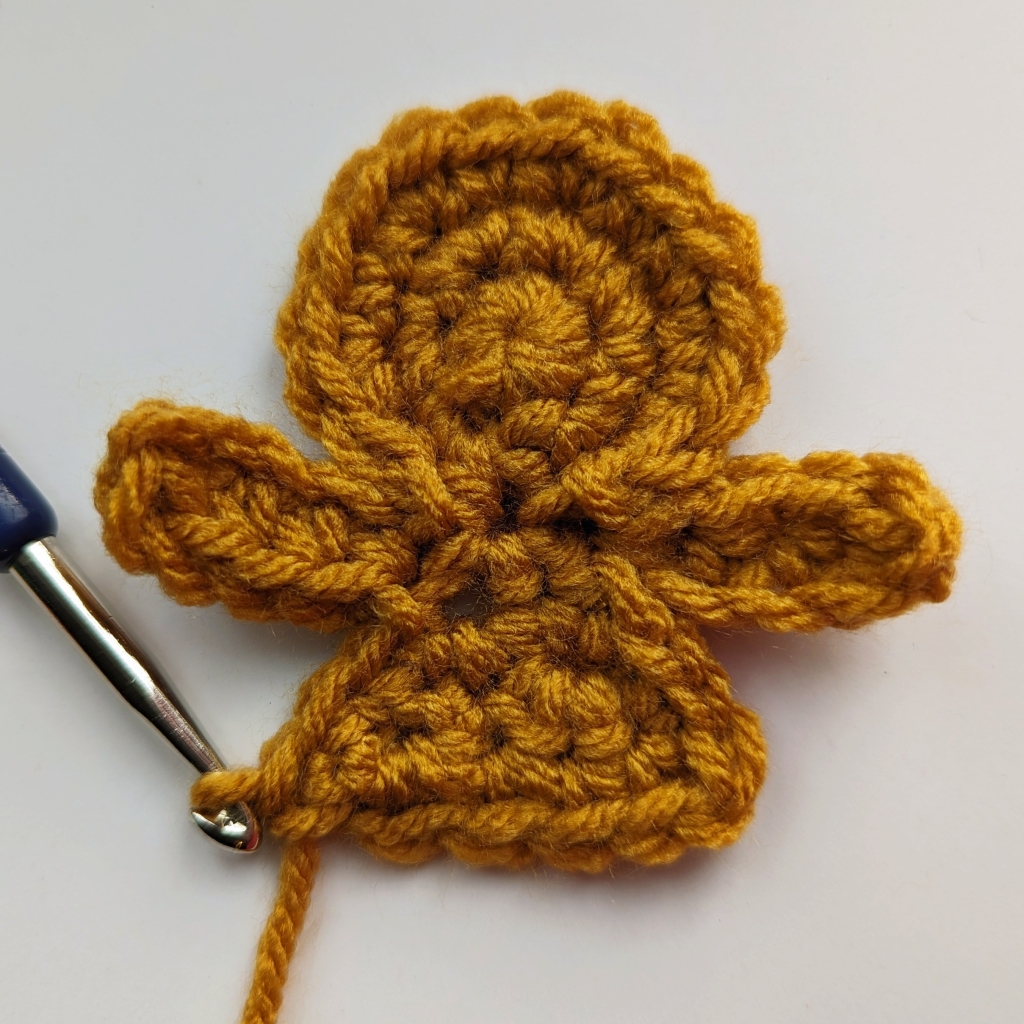
Legs
Row 12: Ch5 and starting in 3rd st, dc in each of the next 3 ch. Sl st to the middle st of Row 6.
Row 13: Ch5 and starting in 3rd st, dc in each of the next 3 ch. Sl st to the body.

Finishing
Weave in and secure all ends. If decorating your gingebread biscuit, attach pom poms or embroider features now as it’s easier to secure and hide all ends inside.

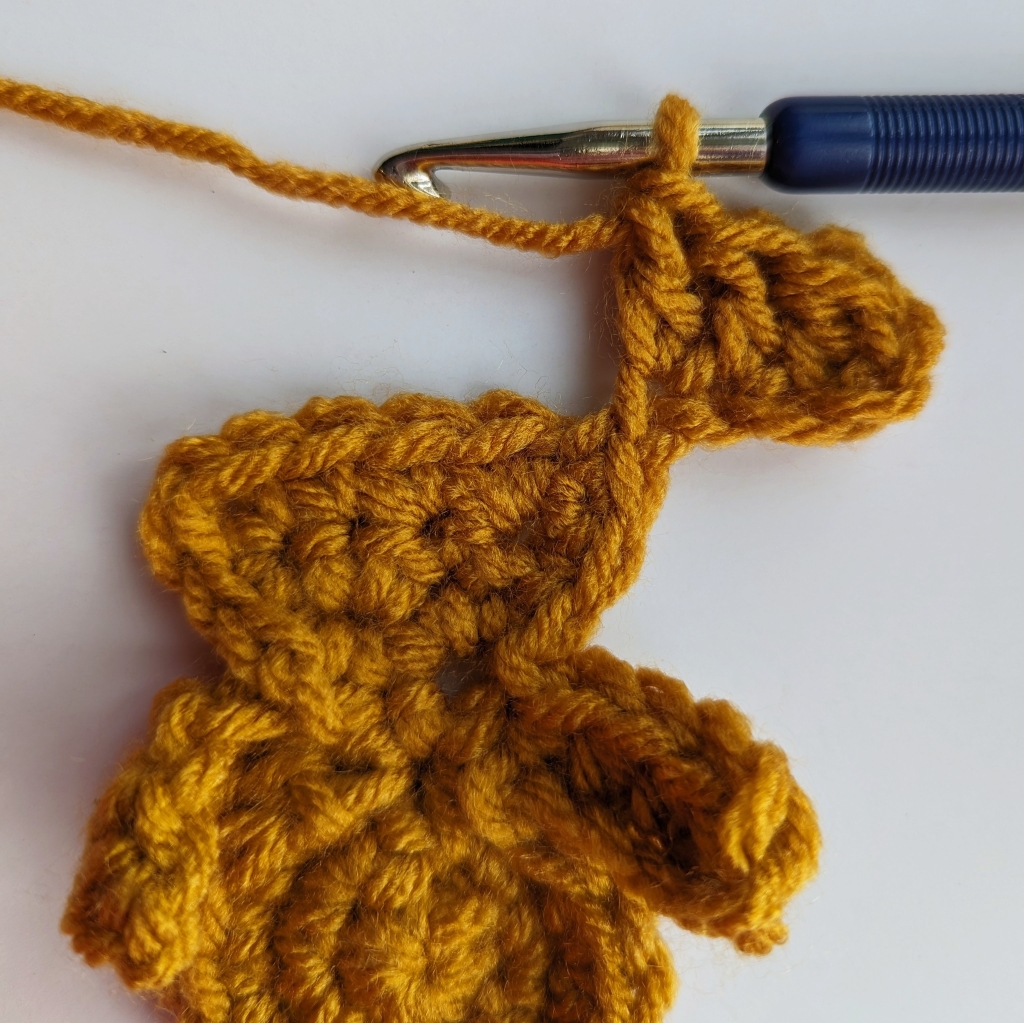
Put two gingerbread biscuits together, with WS facing each other and RS facing out.

With white yarn, make a slip knot and pull through.

You can start anywhere you like – I prefer to start just under the armpit. Slip stitch the edges of the two biscuits together.

When slip stitching around, remember to work through both biscuits, keeping a steady and relaxed tension. It’s good to check whether the biscuits align with each other at each corner like legs, arms, head etc, but it’s quite a forgiving stitch!
Once you get back to the start, secure your ends (I like to tie them together and weave and stuff back inside the biscuit) and your gingerbread biscuit is ready!

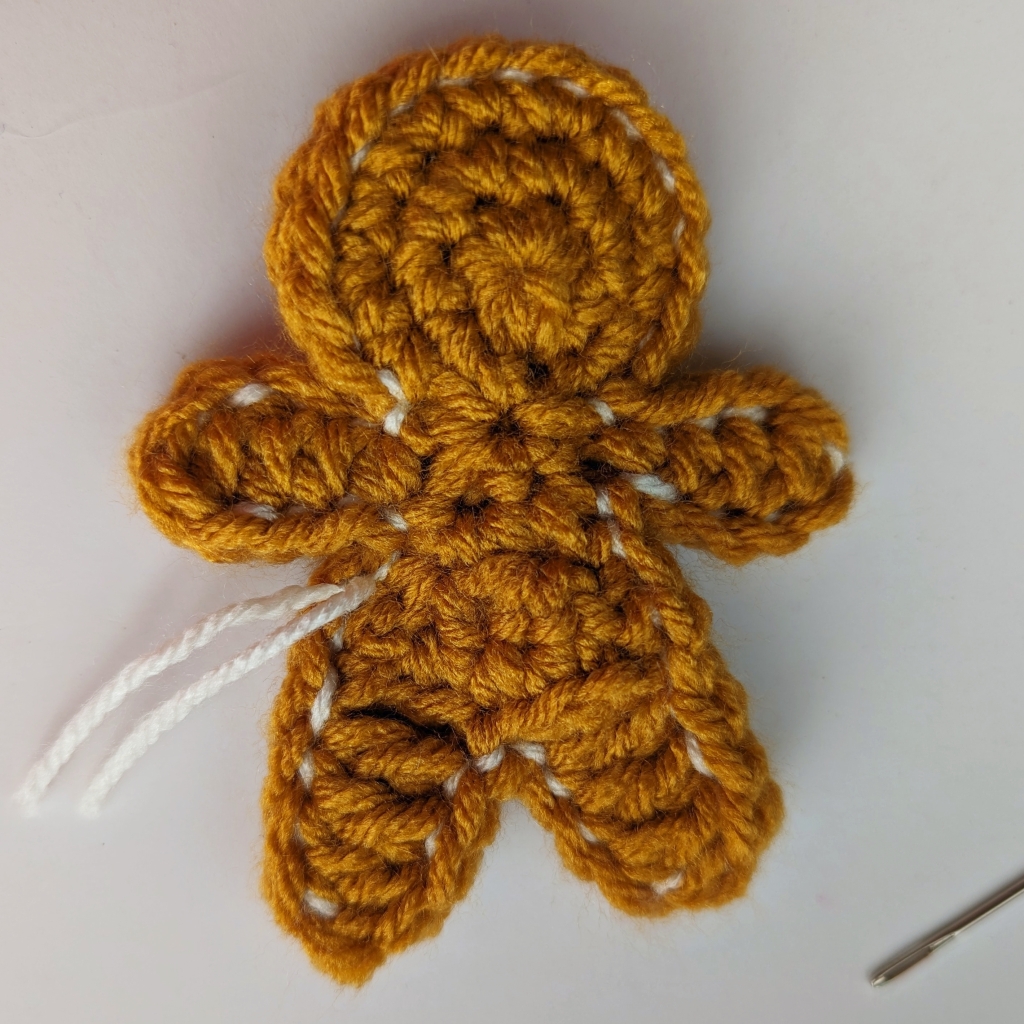
Thank you for crocheting with me! I hope you enjoy your little Gingerbread Biscuit! I’d love to see your creations so please tag me on Instagram and Facebook ❤
Please do not reprint, publish or claim this pattern as your own. If you wish to share this pattern, please share the link to this post.

Leave a comment